Showing posts with label Blogger Knowledge. Show all posts

Saturday, 19 October 2013

Replace Next, Home and Previous links with Beautiful Shiny Buttons in Blogger

Beautiful buttons make your blog attractive and stylish. In most templates they have next, Previous and Home link only not have beautiful buttons. But in this post i will give you best and beautiful way to make your blog's Next, Home, and Previous links with beautiful buttons. How Replace Next, Home and Previous links with Beautiful Shiny Buttons in Blogger, see the easy and simple way to add these 
Beautiful Shiny Buttons in Blogger. For adding these beautiful Shiny Buttons to blog then you have to follow these simple steps.


How to Replace Next, Home and Previous links in Blogger


1. Go to Blogger Dashboard> Template> Edit HTML
2. Make a backup of your blog
3. Search for this code    (Tip: CTRL+ F)
<data:newerPageTitle/>
Now replace the above code with the below code
<img src="URL-OF-PREVIOUS-BUTTON"/> 

4. After this Search for this code
<data:olderPageTitle/> 
Now replace the above code with the below code
<img src="URL-OF-NEXT-BUTTON"/>

5. Then Search for that code
<data:homeMsg/>
Note: The above code appears twice in template and you have to replace the both codes with the below code
<img src="URL-OF-HOME-BUTTON"/> 

i) Replace URL-OF-PREVIOUS-BUTTON with your Previous image URL
ii) Replace URL-OF-NEXT-BUTTON with your Next image URL
iii) Replace URL-OF-HOME-BUTTON with your Home image URL

Save your template and Finally you are done.

Protect your Blog Posts from being Copied

In this new age every person want to become a rich man, in the internet world most of the people copy others blog's content to his/her blog. This is not right to steal other content, because you spend your lot of time for writing articles and when someone copy your that content then you definitely become agar on that person. Google is a Major Search Engine of the world, Google is also against this and if someone steal your content then you told him/her that do not copy the content if he/she does not follow you then you finally told this to Google and Google will definitely remove his/her site from search engine and when someone's blog remove we really disprove because he/she also want to earn money therefore i give a best way to protect your blog from being copied without any worry, Just follow my instructions;


How to protect Your Blog's Content


1. Go to Blogger Dashboard> Layout> Add a Gadget
2. Select "HTML/ JavaScript"
3. Now Copy the below code and paste it in that HTML/ JavaScript Box

<script type="text/javascript">
 var omitformtags=["input", "textarea", "select"]
 omitformtags=omitformtags.join("|")
 function disableselect(e){
 if (omitformtags.indexOf(e.target.tagName.toLowerCase())==-1)
 return false
 }
 function reEnable(){
 return true
 }
 if (typeof document.onselectstart!="undefined")
 document.onselectstart=new Function ("return false")
 else{
 document.onmousedown=disableselect
 document.onmouseup=reEnable
 }
 </script>

 After pasting the above set of code save it. You are done. Now your blog is become as an anti Copying blog.

Submit URL of your blogsite to Google, Bing, Yahoo! and Ask

When you make a blog on any platform like wordpress then you really want to add your blog on major search engines like Google, Bing, Yahoo, Ask and so on, But you don't no that how. If you make a blog on blogger now blogger automatically adds your blog in Google search directory but not add in other major search engines and in word press and other platform you have to add your blog in every Search engine manually, So in this post i will teach you about submission of your desire URL to the Major Search engines directory for free, thus you have to follow these steps which i am going to tell you below;

Once you submit your URL, it could take several days or weeks for the search engines to index your site's pages.


Submit your URL to Google


2. Type your blog/site URL, that you want to add
3. Enter Captcha text shown in box
4. Sekect Add URL

See the example in image

Submit your URL to Bing


1. Go to the following link http://www.bing.com/docs/submit.aspx
2. Type your blog/site URL, that you want to add
3. Enter Captcha text shown in box
4. Sekect Add URL

See the example in image

Submit your URL to Yahoo!


1. Go to the following link http://search.yahoo.com/info/submit.html
2. Click on "Submit your site for free"
3. You will be redirected to Bing, Follow the on-screen instructions for submitting your URL.

Submit your URL to Ask


Ask does not have an URL submit feature. Until recently, you could submit your sitemap to them. But ask.com has been now retired this feature. So, the next best thing is to add a directive in your robots.txt file that specify auto-discovery of the XML sitemap.

Example like that

      Sitemap: http://www.the URLof your sitemap here.xml

 If you will do all the above steps completely it just take some time to index pages, so just be patience and wait for indexing.

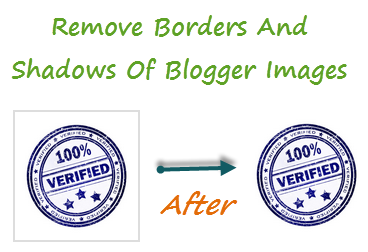
Remove Border and Shadow from your Blogger Images

Remove Border and Shadow from your Blogger Images
I have seen many of times that most of the blogs has border and shadow style arround the images in templates and most of the people don't like these styles and change this style but they does not know that how therefore after a couple of week i brought a new CSS Trick for blogger blog. In this post i am gonna show you a simple method for removing Border and Shadow from your Blogger Images in simple and short CSS code. You have to follow my given instructions. This simple CSS code give you an apportunity to remove Border and Shadow from blogger images. Follow the instrcutions below


See the Demo
Remove Border and Shadow from your Blogger Images

1. First of all Download/Backup your template
2. Now go to your blogger Dashboard> Templates> Edit HTML
3. Search for ]]></b:skin>                     (Tip: Use CTRL+F to find)
4. Add the given below code just above ]]></b:skin>

.post-body img, .post-body .tr-caption-container, .Profile img, .Image img,
.BlogList .item-thumbnail img {
    padding: none !important;
    border: none !important;
    background: none !important;
    -moz-box-shadow: 0px 0px 0px transparent !important;
    -webkit-box-shadow: 0px 0px 0px transparent !important;
    box-shadow: 0px 0px 0px transparent !important;
}

If you will do these simple steps then you successfully done it. With this your blog would appear without any Border and Shadow. Keep visiting my site if you like it.

Remove Attribution Powered by Blogger

Hello our dear precious visitors, you know that when a blogger make a blog at time at the bottom of the default template an Attribution named "Powered by Blogger" appears. Every blogger want to remove it because with this attribute blog does not look like a professional blog. Therefore every blogger want to remove it, but they do not know that how to remove it. Today i will tell you a very very simple and clean procedure for removing Powered by Blogger Attribution. Just follow my below simple instructions;


First your blog look like this


1. Go to Blogger Account> Template> Edit HTML     (See the example below)


2. Now search for ]]></b:skin> and paste the below set of code (Tip: CTRL+ F)
#Attribution1 {display: none;}
 So it will look like this


3. Now save it and your Blog will now have the Powered by Blogger Attribution removed.


Install Template on Blogger Blog

Many of the people want to make their blog more attractive, But by default in blogspot blogger put simple templates which are not attract the people more. Therefore we install new beautiful template to attract our visitors but the problem is that most peoples do not know that how to install 3rd Party template on blogger, Therefore today i will tell you a complete but more simple method for installing your desired 3rd Party template on your blogger blog. See the method below  and Follow these easy steps:


How to install your Desirred 3rd Party Template on Blogger Blog


1. Log in to your Blogger Account

2. Now you can see the button on below image, Click on that button

3. Now click on brows button as you can see this at below image and choose your desire template and click on upload button

Now your desire Template has been installed on your blog, Now your blog template is ready to use, you can see your blog.

Disable Right Click Function in Blogger/Worpress

Disable Right Click Function

Hey Guys! Now a days most of the people stealing contents from others blogs to his blog by copying their content. it's illegal to copying content from others. For example you write a personal post on your blog by great struggle and hard work in some hours or days and someone copy your content from your blog in paste it into his blog then you will definitely make an anger on that person.
Therfore today i brought a great anti copying content technique for you.


For Blogger you have to do this


Step 1. Go to blogger Dashboard > Layout > Add a Gadget > HTML / JavaScript.
Step 2. Copy the following below Codes which you desired and paste it in that blogger widget.
Step 3. Save the HTML /JavaScript and view your blog.


For Word Press you have to do that


Step 1. Go to Wordpress Dashboard > Appearance > Widget > Text Widget.
Step 2. Copy the following below Codes which you desired and paste it in that Wordpress widget.
Step 3. Save the HTML /JavaScript and view your blog.


Disable Right Click Funtion With Message


You can change "Right Click Disabled" dialogue with your own choice by search by typing Ctrl + F.

<script language=JavaScript>
//Disable right mouse click Script
// http://yobloghelper.blogspot.com
var message="Right Click Disabled!";
function clickIE4(){
if (event.button==2){alert(message);
return false;}}
function clickNS4(e){
if (document.layers||document.getElementById&&!document.all){
if (e.which==2||e.which==3){alert(message);
return false;}}}
if (document.layers){
document.captureEvents(Event.MOUSEDOWN);
document.onmousedown=clickNS4;}
else if (document.all&&!document.getElementById){
document.onmousedown=clickIE4;}
document.oncontextmenu=new Function("alert(message);return false")
// -->
</script>

 Disable Right Click Funtion Without Message


<script language=JavaScript>
<!--
//Disable right mouse click Script - No alert
// http://yobloghelper.blogspot.com
var message="";
function clickIE() {if (document.all) {(message);return false;}}
function clickNS(e) {if
(document.layers||(document.getElementById&&!document.all)) {
if (e.which==2||e.which==3) {(message);return false;}}}
if (document.layers)
{document.captureEvents(Event.MOUSEDOWN);document.onmousedown=clickNS;}
else{document.onmouseup=clickNS;document.oncontextmenu=clickIE;}
document.oncontextmenu=new Function("return false")
// -->
</script>

Add Google Custom Search Engine to Blog/Website

In this post i will tell you about Google Custom Search Engine. In blogger Google Search Engine already add but in other Platform Google Search engine is not add, so we have to add Google Search engine manually but in other way Google Custom engine is more beautiful as compare to blogger Google Search engine. So today i am going to show you a best but simple way to add Google Custom Search Engine to your blog/site. Just do that:


How to Add Google Custom Search Engine to Blog/Website


1. Go to this link www.google.com/cse/?
2. New page will open now Click on "Add"
3. After this Enter your Blog/site Address and choose your desire language and Click on "Create". you can also change the name by edit it.
4. Then Click on "Get Code" and copy the JavaScript Code and paste it in your blog.
5. Now Save your blog, and You did it.